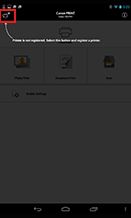
1. Open the Canon PRINT Inkjet App and click on the top left hand corner to register your printer.
CANON PRINT
-
COMPATIBLE PRINTERS
-
FOR ANDROID
-
FOR IOS
Printing as easy as 1, 2, 3..
The Canon PRINT Inkjet/SELPHY app delivers efficiency, functionality and satisfaction. With the use of Wi-Fi connectivity, you can scan and print photos taken on your smartphone or tablet device, as well as documents and web pages.
The compatible multifunctional Canon printers are:
Small Office/ Home Office Inkjet Printers
- MAXIFY MB5410
- MAXIFY MB5110
- MAXIFY MB2710
- MAXIFY MB2110
- MAXIFY iB4110
E Series All-in-One Inkjet Printers
- PIXMA E471
- PIXMA E4210
- PIXMA E3110
- PIXMA E301
Printers with Refill Built-In Ink Tanks
- MAXIFY GX7010
- MAXIFY GX6010
- MAXIFY GX5010
- MAXIFY GX4010
- MAXIFY GX3010
- MAXIFY GX2010
- MAXIFY GX1010
- PIXMA G7010
- PIXMA G6010
- PIXMA G5010
- PIXMA G4170
- PIXMA G4110
- PIXMA G4100
- PIXMA G3160
- PIXMA G3110
- PIXMA G3100
- PIXMA G2170
- PIXMA G610
- PIXMA G510
- PIXMA GM2010
E Series All-in-One Inkjet Printers
- PIXMA E471
- PIXMA E4210
- PIXMA E3110
- PIXMA E301
Photo Inkjet Printers
- PIXMA TS701
Professional Photo Inkjet Printers
- imagePROGRAF PRO-1000
Photo All-in-One Printers
- PIXMA TS9010
- PIXMA TS8010
- PIXMA TS6110
- PIXMA TS6010
- PIXMA TS5110
- PIXMA TS5010
- PIXMA TS3110
- PIXMA MG7710*
- PIXMA MG7110
- PIXMA MG6810*
- PIXMA MG6210
- PIXMA MG5710*
- PIXMA MG3610
- PIXMA MG3010
*The function of the Copy feature using the Canon PRINT app is available for multifunctional PIXMA models launched after July 2015.
For Android™ Devices
From the "Google Play" download the free Canon PRINT Inkjet/SELPHY app to your mobile device.
![]()
With this app you will be able to:
- Set up printer through the mobile device
- Print photos stored in your mobile device
- Print documents stored in your mobile device
- Copy images from your smartphone or tablet
- Scan images and save them in your smartphone or tablet
- Print photos and documents from the Cloud
Initial Set Up
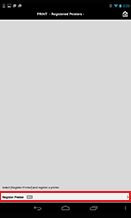
2. Click Register Printer.
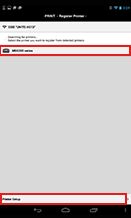
3. The printer(s) that are connected to the same wireless LAN point will appear on the screen. Click on "register printer" to add another printer onto the registration.
Printer Set Up
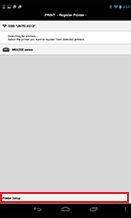
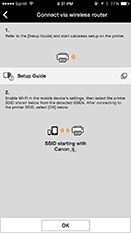
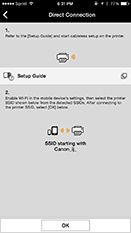
1. After the printer is set up then click on it, you can conduct the printer set up via your mobile device.
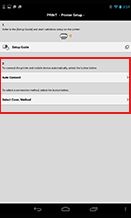
2. Select the method that is desired.

Printing Stored Images
1. Printing Stored Images
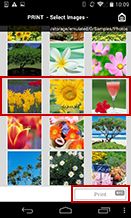
2. Now, select the photos you want to print and then press "Print".
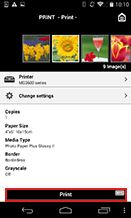
3. Select printing settings such as: paper size, paper type and prints with or without borders. Tap "Print" or tap your smartphone to the printer for NFC printing.
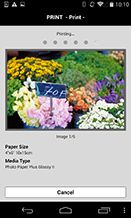
4. Images will get processed and printed.
Printing Stored Documents

1. Select "Document Print" to access your saved documents.

2. Select your document from your menu options.

3. Click on "Print".

Copying Images*

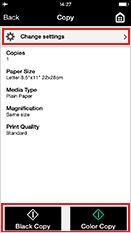
1. Select "Copy" to begin the copying function from the selected printer.

2. Place the document or image in the printer. Afterwards select if its Black or Color Copy and the process begins.

3. Select the copy settings such as paper size, media type, magnification and print quality.
*The function of the Copy feature using the Canon PRINT app is available for multifunctional PIXMA models launched after July 2015.
Scanning Images

1. Select "Scan" to begin scanning process.

2. Place the document or image in the printer. scanning settings such as: Format (JPEG or PDF), type and size of document; in addition to, color or B/W scan. Then click on "Scan" or just tap your smartphone with NFC to the printer.

3. The scanned document will be shown in your screen. Select "Scan" to continue scanning another document or select "Exit" when you are done scanning

4. Once "Exit" is selected, the document is saved onto the mobile device.
Printing from the Cloud
1. Open the Canon PRINT Inkjet app and click on "Cloud".
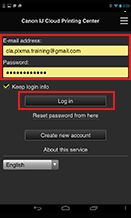
2. Log in to your Canon Inkjet Cloud Printing Center account.

3. Select the Web service that you desired (Instagram, OneNote, Facebook, Twitter, Google Drive etc.)

4. Select the document or image desired.

5. Select on the image or document and click on "Next".
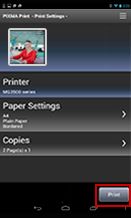
6. Select printing settings such as paper size, paper type and print quality. After choosing your printing preferences press "Print".
For iOS Devices
From the "App Store" download the free Canon PRINT Inkjet/SELPHY app to your mobile device.
![]()
With this app you will be able to:
- Set up printer through the mobile device
- Print photos stored in your mobile device
- Print documents stored in your mobile device
- Copy images from your smartphone or tablet
- Scan images and save them in your smartphone or tablet
- Print photos and documents from the Cloud
Initial Set Up

1. Open the Canon PRINT Inkjet App and click on the top left hand corner to register your printer.

2. Click Register Printer.

3. The printer(s) that are connected to the same wireless LAN point will appear on the screen. Click on "register printer" to add another printer onto the registration.
Printer Set Up

1. After the printer is set up then click on it, you can conduct the printer set up via your mobile device.
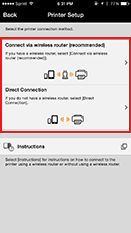
2. Select the method that is desired.
Printing Stored Images

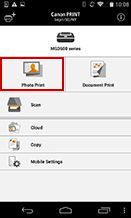
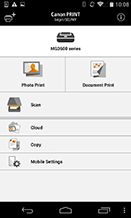
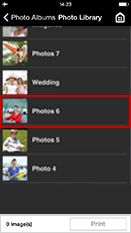
1. Select "Photo Print" to access your photos.

2. Select one of the photo albums where your photos are stored.

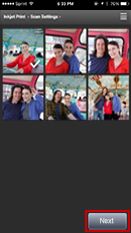
3. Select the images you want to print. Once all images have been selected press "Print".

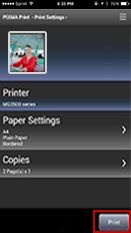
4. Select printing settings such as: paper size, paper type and prints with or without borders. After choosing your printing preferences press "Print".

5. Images will get processed and printed.
Printing Stored Documents

1. Select "Document Print" to access your saved documents.

2. Select your document from your menu options.

3. Click on "Print".

Copying Images*

1. Select "Copy" to begin the copying function from the selected printer.
2. Place the document or image in the printer. Afterwards select if its Black or Color Copy and the process begins.
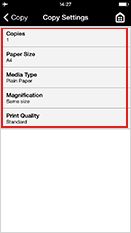
3. Select the copy settings such as paper size, media type, magnification and print quality.
*The function of the Copy feature using the Canon PRINT app is available for multifunctional PIXMA models launched after July 2015.
Scanning Images

1. Select "Scan" to begin scanning process.

2. Select scanning settings such as: type and size of document; color mode, color or B/W scan. Then click on " Scan".

3. The scanned document will be shown in your screen. Select "Scan" to continue scanning another document or select "Exit" when you are done scanning.
4. The scanned document will be shown in your screen. Click on the bottom left-hand corner to access more options.
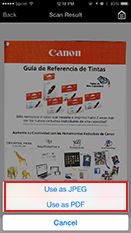
5. Seleccione el formato deseado: JPEG o PDF

6. Choose from one of the following options: save the scanned document in the cloud, save it in your device, send it via email or open it in another application.
Printing from the Cloud
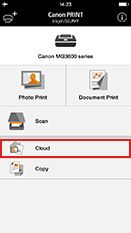
1. Open the Canon PRINT Inkjet app and click on "Cloud".
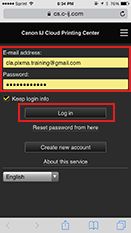
2. Log in to your Canon Inkjet Cloud Printing Center account.
3. Select the Web service that you desire (Instagram, OneNote, Facebook, Twitter, Google Drive etc.)
4. Select the document or image desired.
5. Select on the image or document and click on "Next".
6. Select printing settings such as paper size, paper type and print quality. After choosing your printing preferences press "Print".